Raspberry Pi Weather Station
Discover how to create a Raspberry Pi Weather Station with our step-by-step guide. Perfect for beginners!
weather station and brief overview of raspberry pi
Making a weather conditions station with a Raspberry Pi can be a remunerating project, permitting you to gather and examine climate information. Here is a concise outline of the parts you'll require and the general advances included:
Parts Required:
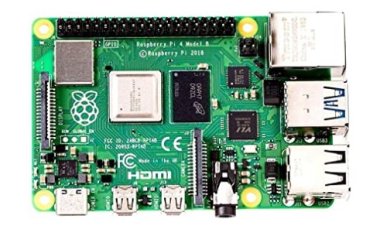
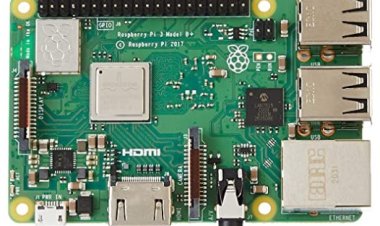
1.Raspberry Pi:
Pick a Raspberry Pi model with adequate capacities. The Raspberry Pi 3 or 4 is generally utilized for such tasks.
2. MicroSD Card:
A microSD card with sufficient extra room to have the working framework and store information.
3. Sensors:
Climate sensors like a DHT11 or DHT22 for temperature and mugginess, and a BMP180 or BMP280 for pressure are normally utilized.
4. Breadboard and Jumper Wires:
To associate the sensors to the Raspberry Pi GPIO pins.
5. Power Supply:
A steady power supply viable with your Raspberry Pi model.
6. Walled in area (Discretionary):
Safeguard your Raspberry Pi and sensors by putting them in a nook appropriate for open air use.
General Steps to Create a Raspberry Pi Weather Station:
- Prepare the Raspberry Pi:
Install the Raspberry Pi OS on the microSD card and configure the basic settings.
- Connect Sensors:
Connect the weather sensors to the GPIO pins on the Raspberry Pi using the breadboard and jumper wires.
- Install Required Software:
Depending on the sensors used, install the necessary Python libraries or software packages to read data from the sensors.
- Collect Weather Data:
Write a Python script to read data from the sensors at regular intervals and store it in a file or database. You can use tools like `cron` to schedule data collection.
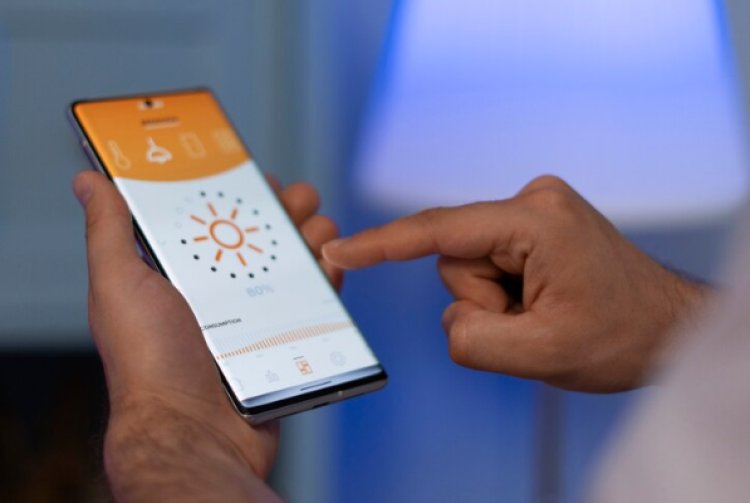
- Visualize Data:
Create a web-based dashboard using tools like Flask or Django to display real-time weather data. Alternatively, you can use visualization platforms like Grafana.
- Optional: Upload Data to the Cloud:
If you want to store your weather data in the cloud, consider using platforms like ThingSpeak, Blynk, or any other cloud service. Ensure secure data transmission.
- Power Management (Optional):
Implement power management strategies to optimize energy usage, especially if deploying the weather station in a remote location.
- Enclosure and Outdoor Placement (Optional):
If your weather station will be placed outdoors, ensure the Raspberry Pi and sensors are adequately protected from the elements. Consider using a weatherproof enclosure.
- Testing:
Test your weather station setup by monitoring the data and ensuring the sensors are providing accurate readings.
- Maintenance and Calibration:
Regularly check and calibrate the sensors to maintain accurate measurements. Update software and firmware as needed.
Remember to refer to the documentation for the specific sensors you are using and explore various software options based on your preferences. Raspberry Pi community forums and online resources can also be valuable for troubleshooting and refining your weather station project.
Prerequisites: Necessary materials needed for the weather station
Creating a Raspberry Pi weather station requires a set of materials to measure and collect data about temperature, humidity, and pressure. Here are the necessary components:
Hardware Components:
- Raspberry Pi:
- Choose a Raspberry Pi board (e.g., Raspberry Pi 3 or Raspberry Pi 4) with sufficient processing power and GPIO pins.
- MicroSD Card:
- A microSD card with enough storage space (8GB or more) to install the operating system and store data.
- Power Supply:
- A stable power supply compatible with your Raspberry Pi model.
- Weather Sensors:
- Choose appropriate sensors for measuring weather parameters. Common ones include:
- Temperature and Humidity Sensor: DHT11 or DHT22.
- Barometric Pressure Sensor: BMP180 or BMP280.
- Breadboard and Jumper Wires:
- To connect the weather sensors to the GPIO pins on the Raspberry Pi.
- Enclosure (Optional):
- If placing the weather station outdoors, consider an enclosure to protect the Raspberry Pi and sensors from the weather.
Software Components:
- Raspberry Pi OS:
- Download and install the Raspberry Pi OS on the microSD card. Raspbian is a popular choice.
- Python Libraries:
- Depending on the sensors you choose, you'll need Python libraries to interact with them. For example:
- For DHT sensors: Adafruit_DHT library.
- For BMP sensors: Adafruit_BMP library.
Additional (Optional) Components:
- Solar Panel and Battery (for Remote Deployments):
- If the weather station is in a remote location, a solar panel and battery setup can provide power.
- Web Server Software (Optional):
- For visualizing weather data, you might use web server software like Flask or Django. Alternatively, you can use platforms like ThingSpeak or Blynk.
Tools:
- Screwdrivers and Mounting Tools (for Enclosure):
- If you're using an enclosure, you'll need tools for mounting and securing the components.
- Computer or Laptop:
- To set up the Raspberry Pi, install software, and perform initial configurations.
Steps:
- Prepare the Raspberry Pi:
- Install the Raspberry Pi OS on the microSD card, boot up the Raspberry Pi, and configure basic settings.
- Connect Sensors:
- Connect the weather sensors to the GPIO pins on the Raspberry Pi using the breadboard and jumper wires.
- Install Python Libraries:
- Install the necessary Python libraries for your chosen sensors.
- Write Data Collection Script:
- Develop a Python script to read data from the sensors at specified intervals and store it.
- Visualize Data (Optional):
- Set up a web-based dashboard to visualize the weather data using Flask, Django, or other visualization platforms.
- Test and Calibrate:
- Test the weather station setup, monitor the data, and calibrate the sensors if needed.
- Enclosure and Outdoor Placement (Optional):
- If deploying the station outdoors, place the components in a weatherproof enclosure and mount it securely.
- Power Management (Optional):
- Implement power management strategies, especially for remote deployments, such as using solar panels and batteries.
By gathering these materials and following the necessary steps, you can create an effective Raspberry Pi weather station for monitoring environmental conditions. Adjustments and customizations can be made based on your specific requirements and preferences.
Sourcing and connecting necessary hardware
Sourcing and connecting the necessary hardware for your Raspberry Pi weather station involves obtaining the components and assembling them. Here's a step-by-step guide:
- Sourcing Necessary Hardware:
Raspberry Pi and Accessories:
- Purchase a Raspberry Pi board (e.g., Raspberry Pi 3 or Raspberry Pi 4).
- Acquire a compatible microSD card (8GB or more) and install the Raspberry Pi OS on it.
- Use a stable power supply appropriate for your Raspberry Pi model.
Weather Sensors:
- Choose weather sensors based on your preferences:
- Temperature and Humidity Sensor: DHT11 or DHT22.
- Barometric Pressure Sensor: BMP180 or BMP280.
- Purchase the selected sensors from reputable suppliers or electronics stores.
Breadboard and Jumper Wires:
- Obtain a breadboard and jumper wires to facilitate the connection between the Raspberry Pi and sensors.
Enclosure and Mounting Tools (Optional):
- If you plan to deploy the weather station outdoors, consider purchasing a weatherproof enclosure and the necessary mounting tools.
Solar Panel and Battery (Optional):
- If your weather station will be placed in a remote location, consider sourcing a solar panel and battery setup for power.
- Connecting Hardware:
a. Raspberry Pi Setup:
-
-
- Insert the microSD card with the installed Raspberry Pi OS into the Raspberry Pi.
- Connect the Raspberry Pi to a display, keyboard, and mouse for initial setup. Alternatively, use SSH for a headless setup.
-
b. Sensor Connection:
-
-
- Identify the GPIO pins on your Raspberry Pi.
- Connect the weather sensors to the appropriate GPIO pins using jumper wires and the breadboard.
-
- For DHT sensors, connect to the GPIO pins for data and power.
- For BMP sensors, connect to the GPIO pins for data, power, and ground.
c. Power Supply:
-
-
- Connect the power supply to the Raspberry Pi to provide a stable power source.
-
d. Optional Components:
-
-
- If using an enclosure, place the Raspberry Pi and sensors inside and secure them.
- If deploying outdoors, use mounting tools to secure the enclosure in the desired location.
-
e. Solar Panel and Battery (Optional):
-
-
- Connect the solar panel to the Raspberry Pi or a charge controller.
- Connect the battery to the power supply, allowing for uninterrupted operation even in remote areas.
-
- Software Configuration:
- Boot up the Raspberry Pi and configure the basic settings, including Wi-Fi (if applicable).
- Install the required Python libraries for the weather sensors.
- Write a Python script to read data from the sensors and store it at specified intervals.
- Testing:
- Test the weather station setup by monitoring data readings from the sensors.
- Ensure the sensors are providing accurate readings, and troubleshoot any issues.
- Optional: Visualization and Deployment:
-
- If desired, set up a web-based dashboard for visualizing weather data.
- Deploy the weather station to its intended location, ensuring it's securely mounted and protected if placed outdoors.
By following these steps, you can source and connect the necessary hardware for your Raspberry Pi weather station. Always refer to the documentation provided with each component for specific wiring details and considerations.
Introducing and Setting Up Programming for Weather conditions Station
Designing the product for your Raspberry Pi weather conditions station includes setting up the Raspberry Pi operating system, introducing the fundamental Python libraries for your climate sensors, and composing a content to gather and store climate information. The following is a bit by bit guide:
1. Introduce Raspberry Pi operating system:
1. Download the most recent Raspberry Pi operating system picture from the authority Raspberry Pi site: [Raspberry Pi Downloads](https://www.raspberrypi.org/downloads/).
2. Streak the downloaded operating system picture onto the microSD card utilizing an instrument like Etcher.
3. Embed the microSD card into the Raspberry Pi and power it up.
2. Interface with the Web:
1. Arrange the Raspberry Pi to associate with your nearby organization. You can do this through the Raspberry Pi Design device or by altering the '/and so forth/organization/connection points' record.
3. Update and Overhaul:
Open a terminal and run the accompanying orders to guarantee your framework is exceptional:
'''slam
sudo adept update
sudo adept overhaul
'''
4. Introduce Python Libraries for Climate Sensors:
1. For DHT Sensors (Temperature and Stickiness):
'''slam
sudo pip3 introduce Adafruit_DHT
'''
2. For BMP Sensors (Barometric Strain):
'''slam
sudo pip3 introduce Adafruit-BMP
'''
5. Compose a Python Content:
Make a Python content to peruse information from the sensors and store it. For instance, make a document named 'weather_station.py':
'''python
import Adafruit_DHT
import Adafruit_BMP.BMP085 as BMP085
import time
import datetime
# DHT Sensor Design
DHT_SENSOR = Adafruit_DHT.DHT22
DHT_PIN = 4 # GPIO pin for DHT sensor
# BMP Sensor Design
bmp_sensor = BMP085.BMP085()
# Information Record
data_file = "weather_data.csv"
while Valid:
attempt:
# Peruse DHT sensor information
stickiness, temperature = Adafruit_DHT.read_retry(DHT_SENSOR, DHT_PIN)
# Peruse BMP sensor information
pressure = bmp_sensor.read_pressure()
# Get current time
timestamp = datetime.datetime.now().strftime("%Y-%m-%d %H:%M:%S")
# Print and log information
print(f"{timestamp} - Temp: {temperature:.2f}°C, Stickiness: {humidity:.2f}%, Tension: {pressure:.2f} hPa")
# Affix information to the CSV document
with open(data_file, "a") as document:
file.write(f"{timestamp},{temperature},{humidity},{pressure}\n")
# Sit tight for 5 minutes before the following perusing
time.sleep(300)
but Special case as e:
print(f"Error: {e}")
'''
Save this content and run it utilizing:
'''slam
python3 weather_station.py
'''
This content gathers information from DHT and BMP sensors, prints it to the control center, and adds it to a CSV record ('weather_data.csv'). Change the content in view of your sensor models and prerequisites.
6. Discretionary: Web Perception (Carafe Model):
To envision information through a web interface, you can utilize a web structure like Flagon. Introduce Jar utilizing:
'''slam
sudo pip3 introduce jar
'''
Make a Carafe application that peruses information from the CSV record and shows it. This requires extra coding and is past the extent of a short outline.
7. Run the Weather conditions Station Content:
Subsequent to arranging the content, run it and notice the result. Guarantee that information is being gathered and put away accurately.
'''slam
python3 weather_station.py
'''
Your Raspberry Pi weather conditions station ought to now be functional, gathering information from the sensors and alternatively imagining it through a web interface. Changes can be made in light of your particular equipment and undertaking prerequisites.