Enhance Your Raspberry Pi Internet Radio: 5 Powerful Tips
Boost your Raspberry Pi radio reception with expert antenna tips. Unleash a clearer and stronger signal for an unparalleled radio experience.
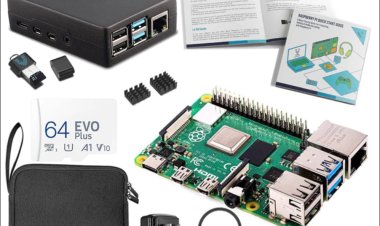
Overview of the components and tools
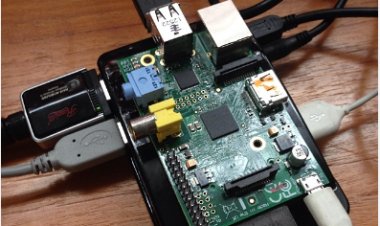
Creating a Raspberry Pi Internet Radio involves gathering both hardware and software components
Essential Hardware:
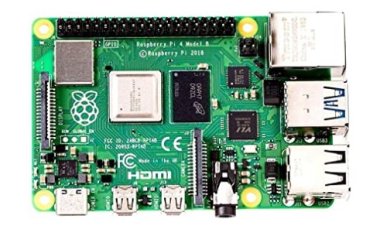
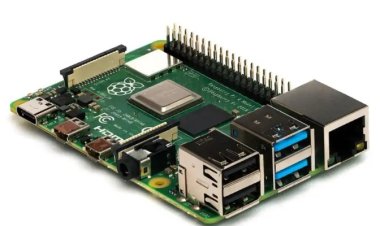
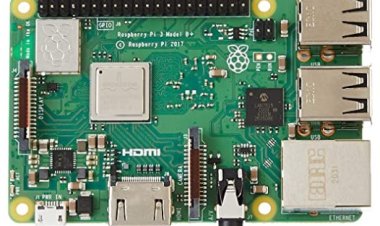
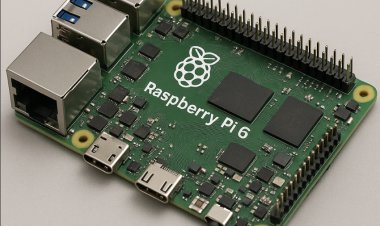
1. Raspberry Pi:
- Opt for a Raspberry Pi board, like the Raspberry Pi 3 or 4, ensuring it has sufficient processing power and connectivity options.
2. MicroSD Card:
- Grab a microSD card with a minimum of 8GB to host the operating system and store media files.
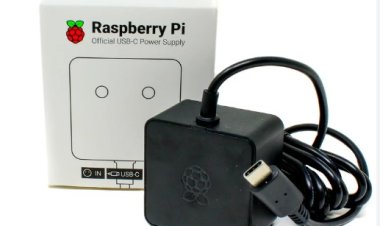
3. Power Supply:
- Secure a stable power supply compatible with your specific Raspberry Pi model.
4. Audio Output:
- Obtain audio output connectors, like a 3.5mm audio jack or HDMI, based on your specific audio setup requirements. Ensure compatibility for a smooth Raspberry Pi Internet Radio assembly.
5. Speaker:
- Connect an external speaker or audio output device for sound playback.
6. Internet Connection:
- Establish internet connectivity through Ethernet or Wi-Fi, based on your preference and the Raspberry Pi model.
Required Software:
1. Raspberry Pi OS:
- Download and install the Raspberry Pi OS on the microSD card.
2. Internet Radio Software:
- Select software to play and manage internet radio streams. Popular choices include:
- MPD (Music Player Daemon): Known for its flexibility and power.
- Mopidy: Supports various streaming services and offers control through a web interface.
- VLC (VideoLAN Client): A versatile multimedia player capable of handling internet radio streams.
3. Control Interface:
- Decide on your preferred method for controlling the Internet Radio. Options include:
- Web Interface: Many internet radio software solutions provide a user-friendly web-based interface.
- Mobile Apps: Some applications or platforms offer dedicated mobile apps for convenient remote control.
4. Optional: Display and Buttons (for UI):
- If you desire a physical interface, consider adding a compact touchscreen display and buttons for controlling playback.
Step-by-Step Setup:
1. Prepare the Raspberry Pi:
- Begin by installing the Raspberry Pi OS on the microSD card.
- Boot up the Raspberry Pi and perform initial configurations.
2. Connect to the Internet:
- Configure the Raspberry Pi to connect to your local network via Ethernet or Wi-Fi.
3. Install Internet Radio Software:
- Depending on your preference (MPD, Mopidy, VLC, etc.), install the relevant software packages.
4. Configure Audio Output:
- Set up the audio output to direct sound to the desired output (3.5mm jack, HDMI, etc.).
5. Configure Internet Radio Streams:
- Add your preferred internet radio streams to the software configuration.
6. Set Up Control Interface:
- Set up the control interface for your Raspberry Pi Internet Radio, choosing between a web interface or a mobile app. Tailor the configuration to your preference for effortless control and customization.
7. Optional UI Components:
- If implementing a display and buttons, connect and configure them according to your preferences.
8. Test and Enjoy:
- Validate your setup by testing various radio streams to ensure seamless functionality.
Keep in mind that specific steps might vary based on the chosen software and hardware components. Always consult the documentation of your selected software for detailed instructions.
Connecting the Raspberry Pi to the internet radio
1. Power Up Your Raspberry Pi:
- Ensure your Raspberry Pi is properly powered using a compatible power supply.
2. Insert the MicroSD Card:
- Insert the microSD card with the installed Raspberry Pi OS into the Raspberry Pi.
3. Connect to the Network:
- Decide whether to use Ethernet or Wi-Fi for internet connectivity:
- Ethernet: Connect the Raspberry Pi to your router using an Ethernet cable.
- Wi-Fi: Configure the Wi-Fi settings on the Raspberry Pi.
- For Wi-Fi, you can use the Raspberry Pi desktop environment or modify the `wpa_supplicant.conf` file on the microSD card before inserting it into the Raspberry Pi. This file should include your Wi-Fi network credentials.
4. Boot Up the Raspberry Pi:
- Power on your Raspberry Pi, and it should boot into the Raspberry Pi OS desktop environment or the command line interface (depending on your configuration).
5. Open a Terminal:
- If you're using the desktop environment, open a terminal window. If you're using the command line interface, you're already in a terminal.
6. Update the System:
- commands to guarantee your system is current and up to date:
sudo apt update
sudo apt upgrade
7. Install Internet Radio Software:
Explore the diverse realm of internet radio software, with options like MPD, Mopidy, VLC offering unique features. Depending on your choice of software, delve into the specific installation instructions tailored to each platform. This targeted approach ensures a seamless integration process, allowing you to optimize your Raspberry Pi Internet Radio based on your preferred software's capabilities.
8. Configure Internet Radio Streams:
- Open the configuration file for your chosen internet radio software and add the URLs or details of your preferred radio stations. This process varies depending on the software you're using, so refer to the documentation.
9. Test the Internet Radio:
- Start your chosen internet radio software and test it with one of the configured radio streams to ensure it's working correctly.
10. Set Up Control Interface:
- If your chosen internet radio software supports a web interface or has a dedicated mobile app, configure it according to the software's instructions.
11. Optional: Display and Buttons (for UI):
- If you've added a display and buttons for a physical interface, ensure they are connected and configured according to your preferences.
12. Enjoy Your Raspberry Pi Internet Radio:
- Your Raspberry Pi should now be connected to the internet radio, and you can enjoy streaming your favorite stations.
Remember to consult the specific documentation for the internet radio software you've chosen for detailed instructions on configuring and using the software.
To install radio tuner software on your Raspberry Pi, you can choose from various options depending on your preferences. Here, I'll provide a general guide using two popular choices: `mpd` (Music Player Daemon) along with `ncmpcpp` (NCurses Music Player Client) for a text-based interface.
Always refer to the official documentation for the most accurate and up-to-date instructions.
Install MPD and MPC:
1. Update Package Lists:
sudo apt update
2. Install MPD and MPC:
sudo apt install mpd mpc
Configure MPD:
3. Edit MPD Configuration:
sudo nano /etc/mpd.conf
- Customize settings, aligning preferences with options like music_directory, bind_to_address, and audio_output for a tailored configuration of your Raspberry Pi Internet Radio.
4. Create Music Directory:
sudo mkdir /var/lib/mpd/music
sudo chown -R mpd:audio /var/lib/mpd
5. Start MPD:
sudo systemctl start mpd
Install ncmpcpp (Optional - For a Text-Based Interface):
6. Install ncmpcpp:
sudo apt install ncmpcpp
Configure ncmpcpp (Optional):
7. Configure ncmpcpp:
nano ~/.ncmpcpp/config
- Set `mpd_host` to `localhost` and adjust other settings as desired.
Access the Radio Tuner:
8. Open ncmpcpp (Optional):
ncmpcpp
- Navigate using arrow keys and use the `5` key for the playlist. You can add internet radio stations manually or import playlists.
9. Control MPD (Optional):
- Use `mpc` commands in the terminal to control MPD.
mpc add
mpc play
Remember to replace `
This guide provides a basic setup for an internet radio tuner using MPD and ncmpcpp. If you prefer a different software, follow the specific installation and configuration steps from its official documentation. For a user-friendly touch, consider exploring alternative graphical interfaces or mobile apps compatible with MPD. Enhance your Raspberry Pi Internet Radio experience with additional options for seamless control and navigation.
Finding the radio station you want to listen
Finding the specific radio station you want to listen to involves identifying its streaming URL or accessing it through a directory provided by your chosen radio tuner software. Here's a general guide on how to find and play a radio station:
1. Determine the Streaming URL:
- Most radio stations provide a streaming URL or playlist file that you can use with your radio tuner software. These can often be found on the radio station's official website or by searching online.
2. Search on Official Websites:
- Visit the official website of the radio station you want to listen to. Look for a "Listen Live" or "Streaming" section, where they often provide the direct streaming URL or links to compatible streaming formats.
3. Internet Radio Directories:
- Many internet radio directories list streaming URLs for various stations. Some popular directories include:
- [Internet-Radio.com](https://www.internet-radio.com/)
- [RadioTuna](https://radiotuna.com/)
- [TuneIn](https://tunein.com/)
4. Using Online Radio Directories in MPD:
- If you're using MPD, you can add stations using the `mpc` command.
mpc add http://streaming_url
mpc play
- Replace `http://streaming_url` with the actual streaming URL of the radio station.
5. Using Web Interfaces:
- Some internet radio software provides web interfaces that allow you to search for and add stations directly from the interface. Check the documentation of your chosen software for details.
6. Explore Station Lists in Software:
- If you're using a graphical interface or a text-based interface like `ncmpcpp`, you might find an option to explore station lists within the software itself.
7. Community Forums and Lists:
- Community forums, blogs, or dedicated lists often compile streaming URLs for various radio stations. A quick online search or a visit to forums related to your interests might yield the information you need.
8. Consider Using Playlists:
- Some radio stations provide playlist files (e.g., .pls, .m3u) that you can import into your radio tuner software. This is an efficient way to add multiple stations.
Final Testing and Enjoying your Raspberry Pi Internet Radio
After setting up your Raspberry Pi Internet Radio and configuring your preferred stations, it's time for final testing and enjoying the experience. Here are some steps to ensure everything is working as expected:
1. Start Your Raspberry Pi:
- Power up your Raspberry Pi and let it boot into the operating system.
2. Connect to the Internet:
- Ensure that your Raspberry Pi is connected to the internet. Verify the connection via Ethernet or Wi-Fi.
3. Launch Internet Radio Software:
- Commence your chosen internet radio software (e.g., MPD, Mopidy, VLC) with the appropriate command or interface to ensure a seamless activation.
4. Test Radio Streams:
- Play a few different radio streams to ensure that the audio is working correctly and that the stations you added are accessible.
5. Adjust Volume:
- If using an external speaker, adjust the volume to your preference. You can use software controls or the hardware controls on your speaker.
6. Control Interface Check:
- If you've set up a control interface, whether it's a web interface or a mobile app, test its functionality. Ensure you can navigate between stations, adjust volume, and control playback.
7.Optional UI Components:
- If you added a display and buttons for a physical interface, test their functionality. Confirm that you can navigate menus, switch stations, and control volume.
8. Troubleshooting:
- If you encounter any issues, check error messages in the terminal or logs. Verify internet connectivity and the accuracy of the streaming URLs.
9. Explore Additional Features:
- Discover supplementary features within your selected software, like playlist creation, station directory exploration, or integration with other services. Uncover the full potential of these capabilities to enrich your Raspberry Pi Internet Radio experience. Maximize the potential of these functionalities to enhance your Raspberry Pi Internet Radio experience.
10. Fine-Tune Configurations:
- Fine-tune configurations based on your preferences. This might include adjusting audio settings, customizing the user interface, or exploring additional plugins or extensions.
11. Enjoy Your Raspberry Pi Internet Radio:
- Once everything is working smoothly, sit back, relax, and enjoy your Raspberry Pi Internet Radio. Explore different genres and discover new stations to enhance your listening experience.
12. Documentation and Future Enhancements:
Document your setup, including software versions, configurations, and any tweaks you made. This documentation will be helpful if you ever need to troubleshoot or replicate your setup in the future.
Consider future enhancements or modifications based on your preferences. This might include adding more hardware components, exploring different software options, or integrating additional features.
By following these steps and ensuring a smooth testing process, you can maximize your enjoyment of the Raspberry Pi Internet Radio you've created. Remember that the flexibility of the Raspberry Pi allows for endless customization, so feel free to experiment and tailor the setup to your liking.