Home Automation using Raspberry Pi
Discover the Power of Home Automation using Raspberry Pi Projects
Overview of home automation using Raspberry Pi
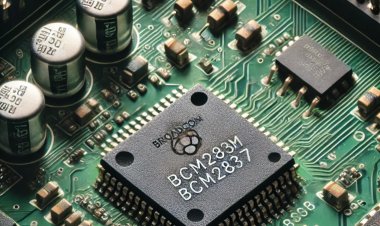
A Raspberry Pi is a small and affordable computer that was first developed to promote the teaching of computer science and basic programming skills. Soon after its debut, the Raspberry Pi inspired a revolution in home automation. Thanks to its small size, user-friendly design, low cost, and open-source platform, the Raspberry Pi has become a popular choice for home automation using raspberry pi projects.
Home automation with a Raspberry Pi enables users to automate many of their home’s functions, such as
- controlling lights,
- appliances,
- door locks,
- sensors,
- alarms.
By combining the Raspberry Pi with micro-controllers and various sensors, such as
- temperature and humidity sensors,
- light sensors,
- motion sensors,
users can create a network of interconnected devices that can be monitored and controlled remotely using a smartphone, tablet, or PC.
The combination of these devices allows users to automate everything from
- security,
- surveillance,
- energy management to gardening,
- irrigation,
- lighting.
Home automation projects with Raspberry Pi can typically be divided into two major categories:
- hardware programming
- software programming.
Hardware programming involves the use of coding and physical devices to control features such as switching on and off lights, controlling the temperature, and managing alarms.
Software programming on the other hand, involves writing commands for the Raspberry Pi to interpret and execute.
Through this method, users can create custom functions and flows for their home automation systems.
Step-by-Step Instructions for Setting Up Home Automation Using Raspberry Pi
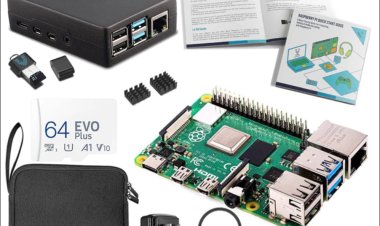
Accumulate the Necessary Parts:
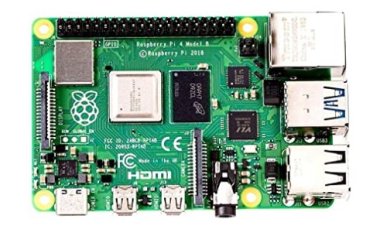
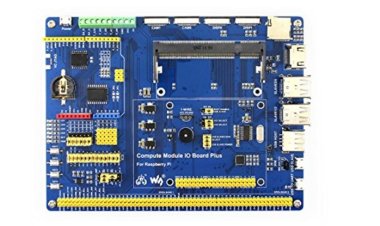
- Raspberry Pi board (ideally a Raspberry Pi 3 or fresher model)
- MicroSD card (8GB or bigger) with the most recent rendition of Raspberry Pi operating system
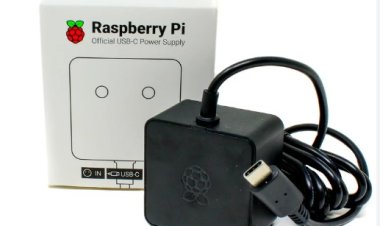
- Power supply for the Raspberry Pi
- Ethernet link or USB Wi-Fi connector (on the off chance that not utilizing a Raspberry Pi with worked in Wi-Fi)
- USB console and mouse
Set up the Raspberry Pi
- Embed the microSD card into your PC.
- Download the most recent adaptation of Raspberry Pi operating system from the authority Raspberry Pi site.
- Utilize a program like Etcher to streak the downloaded picture onto the microSD card.
- Securely launch the microSD card from your PC.
Set Up the Raspberry Pi
- Embed the microSD card into the Raspberry Pi.
- Interface the Raspberry Pi to your screen utilizing the HDMI link (if utilizing one).
- Plug in the USB console and mouse.
- Interface the Ethernet link or USB Wi-Fi connector to associate with the web.
- At last, plug in the power supply to turn on the Raspberry Pi.
Introductory Setup
- When the Raspberry Pi boots up, you'll be incited to set up the Raspberry Pi operating system.
- Adhere to the on-screen guidelines to pick your language, Wi-Fi organization (if relevant), and set a secret phrase.
- Make a point to refresh the Raspberry Pi operating system by opening a terminal and running the accompanying orders:
sudo apt upgrade
Install Home Automation Software
- There are several home automation software options available for Raspberry Pi, but one popular choice is Home Assistant.
- Install Home Assistant by following the official installation guide on their website.
- You can either choose to install Home Assistant in a Python virtual environment or using the Home Assistant Operating System.
- Follow the step-by-step instructions provided for your chosen installation method.
Configure Home Assistant
- After the installation, you can access the Home Assistant web interface by entering the Raspberry Pi's IP address in a web browser on another device connected to the same network.
- Follow the on-screen instructions to create an account and set up Home Assistant.
- Once you're logged in, you can start configuring your home automation devices, integrating different smart devices, and creating automations using the Home Assistant interface.
Connect Smart Devices
- Home Assistant supports a wide range of smart devices and protocols.
- Follow the documentation or guides specific to each device to connect them to Home Assistant.
- Common devices include smart lights, thermostats, door sensors, cameras, etc.
Create Automations
- Use Home Assistant's automation capabilities to create routines and rules for your smart devices.
- This can include scheduling events, setting up triggers, or creating complex rules based on various conditions.
Expand and Customize
- Home Assistant is highly customizable, and you can further enhance your setup by exploring available add-ons, integrations, and custom configurations.
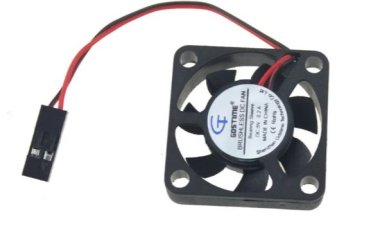
- You can also use additional hardware components such as sensors, relays, or IR blasters to expand the capabilities of your home automation system.
Benefits of home automation with Raspberry Pi
There are various substantial benefits to executing a home robotization framework, which has turned into a well known decision for some families. Utilizing a Raspberry Pi is perhaps of the trendiest pattern in home mechanization at the present time. Home mechanization is presently more open to a more extensive scope of individuals because of the minimal expense of this PC.
There are multiple ways of building a home computerization framework with a Raspberry Pi. A movement sensor based on a Raspberry Pi, for example, can be utilized to distinguish when people are going into or leaving a room. It can likewise be utilized to watch out for your home when you're not there with a camera reconnaissance framework.