Mastering Raspberry Pi 4 Connectivity: Empower Your Projects with Seamless and Reliable Networking
Discover how to unlock the full potential of Raspberry Pi 4 connectivity. Empower your projects with fast, seamless, and reliable networking solutions today!
Overview of Raspberry Pi 4 Connectivity
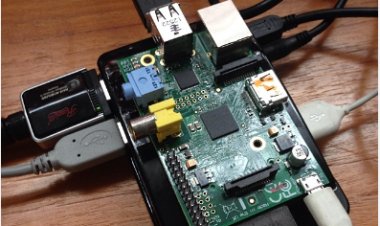
The Raspberry Pi 4, released in June 2019, represents a significant upgrade in connectivity options, enhancing its functionality and versatility for a wide range of applications.
#Key Connectivity Features
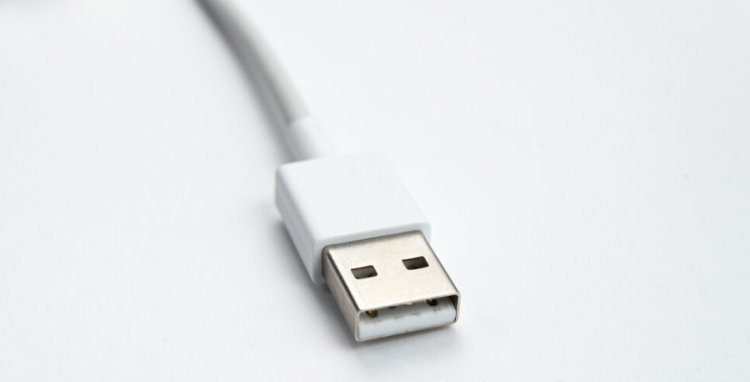
1. USB Ports:
Configuration: The Raspberry Pi 4 is equipped with two USB 3.0 ports and two USB 2.0 ports.
Functionality: The USB 3.0 ports provide faster data transfer rates, making them ideal for high-speed peripherals such as external SSDs or high-resolution webcams. The USB 2.0 ports handle standard peripherals like keyboards and mice.
2. Ethernet:
Port: It features a Gigabit Ethernet port.
Functionality: The Gigabit Ethernet offers higher network speeds compared to the previous models, providing a more reliable and faster wired connection for network-intensive tasks.
3. Wi-Fi:
Specification: The Raspberry Pi 4 includes built-in 802.11ac Wi-Fi.
Functionality: This upgraded Wi-Fi standard supports faster wireless network speeds and improved range, enhancing wireless connectivity for internet access and networking.
4. Bluetooth:
Version: It features Bluetooth 5.0.
Functionality: Bluetooth 5.0 offers improved range and speed compared to previous versions, enabling efficient wireless connections with peripherals such as keyboards, mice, and audio devices.
5. HDMI:
Ports: The Raspberry Pi 4 includes two micro HDMI ports.
Functionality: These ports support dual 4K video output, allowing users to connect two monitors simultaneously for an extended desktop or high-resolution displays.
6. GPIO Pins:
Header: The 40-pin GPIO header remains for custom hardware projects.
Functionality: These pins provide access to digital I/O, PWM, I²C, and UART, facilitating interaction with a variety of electronic components.
7. Networking and Power:
Power: The Raspberry Pi 4 uses a USB-C power connector, providing more power than previous models to support its enhanced features.
The Raspberry Pi 4's comprehensive connectivity options make it a powerful platform for diverse applications, from home automation and multimedia projects to development and educational purposes.
Network Points of interaction (Gigabit Ethernet and Wi-Fi) on Raspberry Pi 4
The Raspberry Pi 4 offers progressed network availability choices, fundamentally upgrading its presentation and flexibility for different applications.
Gbps Ethernet
- Include: The Raspberry Pi 4 is outfitted with a Gigabit Ethernet port.
- Usefulness: This port gives a significant redesign over the past models, offering quicker wired network speeds up to 1 Gbps (1000 Mbps). This considers further developed information move rates and more dependable organization associations, which is great for undertakings requiring high transmission capacity, for example, media streaming, document moves, or server activities.
- Arrangement: To utilize Ethernet, essentially associate an Ethernet link from the Raspberry Pi 4's port to your switch or organization switch. The framework will consequently design the organization settings by means of DHCP, however you can likewise set a static IP if necessary.
Wi-Fi
- Highlight: The Raspberry Pi 4 incorporates worked in 802.11ac Wi-Fi.
- Usefulness: This cutting-edge Wi-Fi standard backings quicker remote organization speeds and further developed range contrasted with the past 802.11n norm. It works with smooth remote web access and vigorous availability for systems administration projects, media streaming, and general web perusing.
- Arrangement: Interfacing with Wi-Fi is direct. Access the organization settings from the Raspberry Pi operating system interface, select your Wi-Fi organization, and enter the secret word. The framework will associate and deal with the remote association naturally.
Together, the Gigabit Ethernet and 802.11ac Wi-Fi on the Raspberry Pi 4 give adaptable and superior execution organizing choices, pursuing it a strong decision for both wired and remote network needs.
USB Ports and Fringe Network on Raspberry Pi 4
The Raspberry Pi 4 improves fringe network with an assortment of USB ports, growing its flexibility for various undertakings and applications.
USB Ports
- Arrangement: The Raspberry Pi 4 elements two USB 3.0 ports and two USB 2.0 ports.
- USB 3.0 Ports: These ports give quicker information move rates, up to 5 Gbps, contrasted with the USB 2.0 ports. This is great for rapid peripherals like outer SSDs or high-goal cameras, offering further developed execution and decreased information move times.
- USB 2.0 Ports: These ports support standard peripherals like consoles, mice, and printers. Albeit more slow than USB 3.0, they are as yet reasonable for a large number of regular gadgets.
Fringe Combination
- Consoles and Mice: Interface USB consoles and mice for direct collaboration with the Raspberry Pi 4. These peripherals are fundamental for client information and control, especially during introductory arrangement or general use.
- Outside Capacity: Connect outer capacity gadgets, as USB streak drives or hard drives, to grow the Raspberry Pi 4's stockpiling limit. This is valuable for overseeing huge documents, backing up information, or involving the Pi as a media community.
- USB Centers: On the off chance that extra USB ports are required, a USB center can be associated with one of the accessible ports, permitting numerous gadgets to be associated all the while.
- Extra Gadgets: The USB ports are viable with different gadgets, including printers, scanners, and USB-to-chronic connectors, improving the Raspberry Pi 4's usefulness.
The improved USB ports on the Raspberry Pi 4 work with broad fringe network, making it a flexible and amazing asset for a large number of utilizations, from general registering to complex undertakings.
GPIO Pins and Expansion Options on Raspberry Pi 4
The Raspberry Pi 4 provides a robust set of GPIO (General Purpose Input/Output) pins and expansion options, enabling a wide range of electronics and hardware projects.
GPIO Pins
- Configuration: The Raspberry Pi 4 includes a 40-pin GPIO header, which is backward compatible with previous Raspberry Pi models.
- Functionality: The GPIO header features a mix of digital I/O pins, including options for PWM (Pulse Width Modulation), I²C (Inter-Integrated Circuit), and UART (Universal Asynchronous Receiver/Transmitter). These pins allow for direct interaction with various electronic components, such as sensors, motors, and LEDs.
- Applications: Users can employ GPIO pins for custom hardware projects, automation tasks, and prototyping. They are essential for building circuits, controlling devices, and creating interactive systems.
Expansion Options
- HAT (Hardware Attached on Top): The Raspberry Pi 4 supports HATs, which are add-on boards designed to stack directly onto the GPIO header. HATs include an EEPROM that provides configuration details and ensures compatibility. They offer additional functionality like extra I/O options, sensors, or specialized hardware.
- Custom Expansion Boards: Beyond HATs, users can design and connect custom expansion boards to the GPIO pins. This flexibility allows for tailored solutions specific to project needs, such as custom shields or daughterboards.
- Breakout Boards: For easier access and use of GPIO pins, breakout boards can be employed. These boards provide additional headers or connectors for simpler connections to external components, facilitating complex projects without direct pin wiring.
The GPIO pins and expansion options on the Raspberry Pi 4 make it a highly adaptable platform for electronics enthusiasts and professionals, supporting a wide range of applications from simple experiments to advanced hardware integration.
Investigating and Advancing Availability on Raspberry Pi 4
Guaranteeing stable network on the Raspberry Pi 4 is essential for dependable execution. This is the way to investigate normal issues and advance your availability:
Investigating Normal Issues
1. Wi-Fi Availability Problems:
- Actually take a look at Signal Strength: Guarantee the Raspberry Pi 4 is close enough to the Wi-Fi switch. Decrease actual impediments and obstruction.
- Confirm Credentials: Twofold check that the SSID and secret key are accurately placed in the organization settings.
- Reboot Devices: Restart both the Raspberry Pi and the switch. This can determine impermanent organization issues.
- Update Firmware: Guarantee that your Raspberry Pi operating system and Wi-Fi drivers are state-of-the-art.
2. Ethernet Issues:
- Actually look at Connections: Guarantee the Ethernet link is safely associated with both the Raspberry Pi and the switch. Test with an alternate link if necessary.
- IP Address Assignment: Run 'ifconfig' to check that the Ethernet interface has an IP address. In the event that not, guarantee that DHCP is empowered on your switch or design a static IP.
- Network Configuration: Affirm that the organization settings are accurately arranged. Check for any organization clashes or issues with the switch.
3. USB Availability Problems:
- Power Supply: Ensure the Raspberry Pi 4 is utilizing an adequate power supply. Deficient power can make USB gadgets glitch.
- Gadget Recognition: Use 'lsusb' to list associated USB gadgets and affirm they are perceived. Attempt different USB ports or gadgets on the off chance that issues continue to happen.
- Check for Conflicts: Guarantee that no equipment clashes are causing the issue. Once in a while, various gadgets might cause clashes in the event that they draw an excess of force.
Enhancing Connectivity
1. Wi-Fi Optimization:
- Channel Selection: Design your switch to utilize a less blocked Wi-Fi channel to diminish impedance.
- Placement: Position the Raspberry Pi 4 and switch to limit obstruction and expand signal strength.
2. Ethernet Optimization:
- Quality Cable: Utilize top notch Ethernet links to guarantee steady and quick associations.
- Network Switch: Utilize a dependable organization change if interfacing various gadgets to guarantee ideal execution.
3. USB Optimization:
- Use USB 3.0 Ports: For high velocity peripherals, interface gadgets to the USB 3.0 ports for quicker information move.
- Outer Power: For eager for power USB gadgets, consider utilizing a controlled USB center point to supply guarantee sufficient power.
By resolving normal issues and carrying out these advancement strategies, you can improve the network and generally speaking execution of your Raspberry Pi 4.