Transform Your Sound: Ultimate Raspberry Pi Audio Projects for Enthusiasts
Discover the best Raspberry Pi audio projects to elevate your sound experience.
Introduction to Raspberry Pi Audio Projects
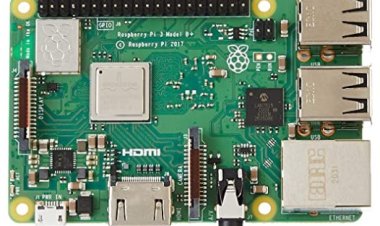
Raspberry Pi, a versatile single-board computer, opens up exciting possibilities for audio enthusiasts. Whether you're a hobbyist or a tech enthusiast, exploring audio projects with Raspberry Pi can be both educational and rewarding.
At its core, Raspberry Pi offers a robust platform for audio experimentation and development. You can start by setting up basic audio playback using the Pi's audio output capabilities, exploring various codecs and file formats. From streaming internet radio to building your own music player, the Pi provides ample opportunities to dive into the world of digital audio.
For those interested in more advanced projects, Raspberry Pi can be transformed into a multi-room audio system using networked devices or integrated into home automation setups for voice-controlled audio commands. Its compatibility with popular audio software and libraries like ALSA and PulseAudio further enhances its flexibility.
In this article, we'll guide you through the essentials of setting up Raspberry Pi for audio projects, discuss key software tools and libraries, and explore a range of project ideas suitable for beginners and experienced users alike. Get ready to embark on a journey into the fascinating realm of Raspberry Pi audio projects!
Setting Up Raspberry Pi for Audio Playback
To set up your Raspberry Pi for audio playback, follow these steps:
- Prepare Your Raspberry Pi: Ensure your Raspberry Pi is set up with an operating system (like Raspbian or Raspberry Pi OS) installed and connected to the internet.
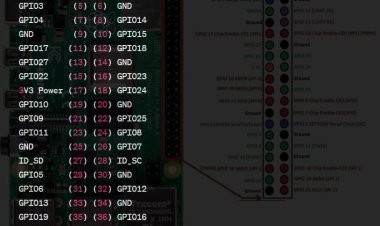
- Connect Audio Output: Use the 3.5mm audio jack or HDMI output for audio playback. If using the 3.5mm jack, connect speakers or headphones.
- Install Audio Software: Open a terminal on your Raspberry Pi or connect remotely via SSH. Install essential audio software like ALSA (Advanced Linux Sound Architecture) for basic audio functionality:
sudo apt-get update
sudo apt-get install alsa-utils
- Test Audio Output: After installation, test the audio output to ensure everything is working correctly. Use the `speaker-test` command to play a test tone:
speaker-test -t sine -f 440 -c 2
Adjust the `-f` parameter for different frequencies and `-c` for different audio channels.
- Configure Audio Settings: Use `alsamixer` to adjust audio levels and settings interactively:
alsamixer
Use arrow keys to navigate and adjust volume levels.
- Play Audio Files: Use a media player like VLC or command-line tools (`aplay`, `mpg321`, etc.) to play audio files. For example:
vlc your_audio_file.mp3
- Automate Playback (Optional): Create scripts or use cron jobs to automate audio playback at specific times or events.
By following these steps, you can set up your Raspberry Pi for audio playback and begin exploring various audio projects and applications.
Playing Audio Files with Raspberry Pi
To play audio files on your Raspberry Pi, you have a few options depending on your setup and preferences:
- Using VLC Media Player:
Install VLC on your Raspberry Pi if not already installed:
sudo apt-get update
sudo apt-get install vlc
Play an audio file using VLC:
vlc your_audio_file.mp3
VLC provides a graphical interface and supports a wide range of audio formats.
- Using OMXPlayer (for Raspberry Pi OS):
OMXPlayer is a command-line video player that can also handle audio files:
omxplayer -o local your_audio_file.mp3
Use `-o local` to force audio output through the 3.5mm jack.
- Using Command-line Tools:
aplay: Basic command-line audio player:
aplay your_audio_file.wav
mpg321: Command-line MP3 player:
mpg321 your_audio_file.mp3
- Python with Pygame (for scripting and customization):
Install Pygame library:
sudo apt-get update
sudo apt-get install python-pygame
Use Python to play audio:
python
import pygame.mixer
pygame.mixer.init()
pygame.mixer.music.load('your_audio_file.mp3')
pygame.mixer.music.play()
Pygame allows for more control and customization in Python scripts.
Choose the method that best fits your needs, whether you prefer a graphical interface, command-line simplicity, or customization through scripting. Each approach allows you to leverage Raspberry Pi's capabilities for audio playback effectively.
Building a Simple Music Player with Raspberry Pi
Components Needed:
- Raspberry Pi (any model with audio output)
- MicroSD card with Raspberry Pi OS installed
- Speakers or headphones
- Optional: LCD display for interface
Steps to Build the Music Player:
- Set Up Raspberry Pi:
Install Raspberry Pi OS on your Pi and ensure it's connected to the internet.
- Install Required Software:
Install necessary packages like VLC or OMXPlayer for audio playback:
sudo apt-get update
sudo apt-get install vlc
- Store Music Files:
Transfer your music files (MP3, WAV, etc.) to a folder on your Raspberry Pi. You can use USB drives or network shares for storage.
- Create a Simple Interface (Optional):
If using an LCD display, set it up to show song titles, play controls, and status. Python libraries like Pygame or Tkinter can be used for GUI development.
- Develop Control Scripts:
-
- Use Python or shell scripts to control playback:
- Play a specific song:
vlc --play-and-exit /path/to/your_song.mp3
Create playlists and automate playback based on user input.
- Enhance User Experience (Optional):
-
- Add features like volume control, shuffle, repeat, and playlist management.
- Incorporate voice control using tools like Google Assistant SDK or Amazon Alexa.
- Testing and Debugging:
-
- Test your music player with different audio files and ensure all controls function as expected.
- Debug any issues with playback, connectivity, or user interface.
- Enclosure and Final Setup:
-
- If desired, build an enclosure for your Raspberry Pi and components to make it a standalone music player.
- Ensure the audio output is connected to your speakers or headphones for playback.
By following these steps, you can create a simple yet functional music player using Raspberry Pi, tailored to your preferences and skills in programming and electronics.
Exploring Basic Audio Effects with Raspberry Pi
- Echo Effect
The echo effect repeats a sound after a short delay, simulating an echo. You can achieve this using software like `sox` (Sound eXchange):
Install `sox` if not already installed:
sudo apt-get update
sudo apt-get install sox
Create an echo effect on an audio file:
sox input.wav output_with_echo.wav echo 0.8 0.9 60 0.5
Adjust parameters (`0.8` is delay, `0.9` is decay, `60` is spacing, and `0.5` is regeneration) to change the echo effect.
- Reverb Effect
Reverb adds depth and space to audio by simulating reflections in a room:
Use `sox` to apply reverb:
sox input.wav output_with_reverb.wav reverb 50 50 50 50 0
Adjust parameters (`50`) to modify reverb characteristics.
- Pitch Shift Effect
Pitch shifting alters the pitch (frequency) of audio without changing its speed:
Use `sox` for pitch shifting:
sox input.wav output_pitch_shifted.wav pitch 500
Adjust `500` to change pitch in cents.
- Equalization (EQ) Effect
EQ adjusts the balance of frequencies in audio:
Apply EQ using `sox`:
Sox input.wav output_eq.wav equalizer 1000 1.5q -3 equalizer 5000 2q 3
Adjust frequency (`1000`, `5000`) and gain (`1.5q`, `2q`) values.
- Distortion Effect
Distortion modifies the waveform to create a gritty or distorted sound:
Use `sox` for distortion:
sox input.wav output_distorted.wav overdrive 20
Adjust `20` for varying levels of distortion.