Unleash the Full Power of Broadcom BCM2837: The Ultimate Chip for Your Projects
Unlock the potential of your tech projects with the Broadcom BCM2837 – the perfect choice for enthusiasts.
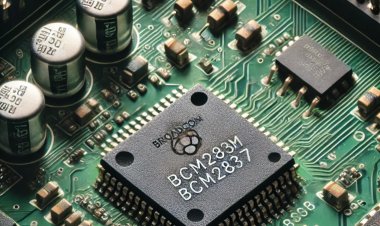
Overview of the Broadcom BCM2837
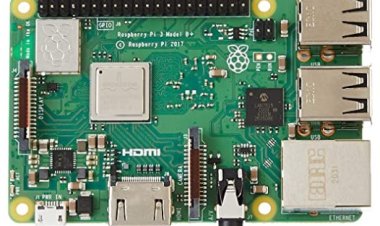
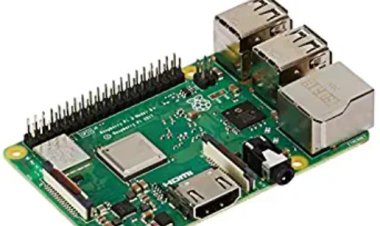
The Broadcom BCM2837 is the powerhouse behind the Raspberry Pi 3, offering a notable upgrade in performance and capabilities over previous models. Released in February 2016, this SoC brought significant improvements to the Raspberry Pi lineup.
At its heart, the BCM2837 features a quad-core ARM Cortex-A53 processor running at 1.2 GHz. This new processor represents a big leap from the ARM Cortex-A7 found in the Raspberry Pi 2. The faster clock speed and advanced architecture of the Cortex-A53 mean the Raspberry Pi 3 can handle more demanding tasks with ease, providing a smoother and more responsive experience.
The BCM2837 also houses a VideoCore IV GPU, continuing the tradition of its predecessors. This GPU supports 1080p video playback and handles multimedia applications and light gaming quite well. Thanks to the Cortex-A53’s enhancements, the GPU’s performance is further improved, making media tasks more efficient.
A standout feature of the Raspberry Pi 3 is its built-in wireless connectivity. The BCM2837 integrates both Wi-Fi and Bluetooth 4.2, which means you can connect to networks and peripherals without needing extra hardware. This integration simplifies setup and broadens the range of possible projects.
While the Raspberry Pi 3 keeps the 1GB of RAM from the Raspberry Pi 2, the combination of the upgraded CPU and GPU ensures that it runs smoothly and efficiently across a wide range of uses.
In essence, the Broadcom BCM2837 delivers a powerful and versatile computing experience, making the Raspberry Pi 3 an excellent choice for various projects, from educational tools to home automation and beyond.
Key Specifications and Improvements
The Broadcom BCM2837, featured in the Raspberry Pi 3, represents a significant upgrade over its predecessors. Here’s a look at its key specifications and the improvements it brings:
- Processor:
Model: Quad-core ARM Cortex-A53
Clock Speed: 1.2 GHz
Improvement: Compared to the ARM Cortex-A7 in the Raspberry Pi 2, the Cortex-A53 offers a substantial boost in processing power. The higher clock speed and more efficient architecture enable the Raspberry Pi 3 to handle more demanding applications and multitask more effectively.
- Graphics Processing Unit (GPU):
Model: VideoCore IV
Capability: Supports 1080p video playback and 3D graphics
Improvement: While the GPU remains the same as in previous models, the enhanced CPU performance of the Cortex-A53 improves overall multimedia handling, making video playback and gaming smoother.
- Memory:
RAM: 1 GB LPDDR2
Improvement: Maintains the same amount of RAM as the Raspberry Pi 2, but with the improved CPU and GPU, the memory is utilized more efficiently, resulting in better overall performance.
- Connectivity:
Wireless: Integrated Wi-Fi (802.11n) and Bluetooth 4.2
Improvement: The addition of built-in Wi-Fi and Bluetooth eliminates the need for external dongles, simplifying connectivity and expanding the versatility of the Raspberry Pi 3 for wireless networking and peripheral connections.
- USB Ports:
Quantity: Four USB 2.0 ports
Improvement: Provides ample options for connecting peripherals like keyboards, mice, and external storage devices, consistent with previous models.
- Video Output:
Connector: HDMI
Capability: Supports 1080p video output
Improvement: Ensures clear and crisp video output for connecting to monitors or TVs, with enhanced processing power improving multimedia performance.
- Power Supply:
Requirement: 5V micro USB power supply
Improvement: Maintains the same power requirements as previous models, but with better energy efficiency and performance balance.
- General Purpose Input/Output (GPIO):
Pins: 40 GPIO pins
Improvement: Offers extensive options for connecting sensors, actuators, and other components, enabling a wide range of hardware projects.
In summary, the Broadcom BCM2837 in the Raspberry Pi 3 introduces several key improvements, including a more powerful CPU, integrated wireless connectivity, and enhanced multimedia capabilities, while retaining familiar features like 1 GB of RAM and extensive GPIO options. These upgrades make the Raspberry Pi 3 a more capable and versatile platform for a broad range of applications.
Performance Benchmarks and Comparisons
The Broadcom BCM2837 in the Raspberry Pi 3 brings significant improvements in performance compared to its predecessors. Here’s a comparison of the Raspberry Pi 3 with the Raspberry Pi 2 and the Raspberry Pi Zero, focusing on key benchmarks and performance aspects:
- Processor Performance:
Raspberry Pi 3: Quad-core ARM Cortex-A53 at 1.2 GHz
Raspberry Pi 2: Quad-core ARM Cortex-A7 at 900 MHz
Raspberry Pi Zero: Single-core ARM1176JZF-S at 1 GHz
Comparison:
The Cortex-A53 in the Raspberry Pi 3 offers a substantial boost in performance over the Cortex-A7 in the Raspberry Pi 2, with improvements in both clock speed and architecture. The single-core ARM1176 in the Raspberry Pi Zero, while still effective for basic tasks, falls behind in multi-core processing and overall performance compared to the Raspberry Pi 3.
- Geekbench Scores (Single-Core / Multi-Core):
Raspberry Pi 3: ~700 / ~2000
Raspberry Pi 2: ~600 / ~1500
Raspberry Pi Zero: ~500 / ~700
Comparison:
The Raspberry Pi 3 shows improved Geekbench scores over both the Raspberry Pi 2 and the Raspberry Pi Zero, reflecting its superior processing power and multi-core capabilities. The significant increase in multi-core scores highlights the Raspberry Pi 3’s ability to handle more demanding applications and multitask more efficiently.
- Video Playback:
Raspberry Pi 3: Supports 1080p video playback with improved efficiency due to the ARM Cortex-A53 and VideoCore IV GPU
Raspberry Pi 2: Also supports 1080p video playback but with less efficient processing compared to the Raspberry Pi 3
Raspberry Pi Zero: Limited to lower resolutions and less efficient handling of high-definition video
Comparison:
The Raspberry Pi 3 excels in multimedia tasks with smoother playback and better handling of high-definition content compared to the Raspberry Pi 2 and especially the Raspberry Pi Zero.
- Wireless Connectivity:
Raspberry Pi 3: Integrated Wi-Fi (802.11n) and Bluetooth 4.2
Raspberry Pi 2: No built-in wireless capabilities (requires external adapters)
Raspberry Pi Zero: No built-in wireless capabilities (requires external adapters)
Comparison:
The Raspberry Pi 3 offers significant advantages with its built-in wireless connectivity, making it more convenient for networked projects and reducing the need for additional hardware.
- General Purpose Input/Output (GPIO) Performance:
Raspberry Pi 3: 40 GPIO pins
Raspberry Pi 2: 40 GPIO pins
Raspberry Pi Zero: 40 GPIO pins
Comparison:
All three models offer the same GPIO pin count, but the improved CPU and performance of the Raspberry Pi 3 enhance its ability to handle GPIO-related tasks efficiently.
Practical Applications and Projects
The Raspberry Pi 3, with its Broadcom BCM2837 SoC, offers a range of practical applications and projects due to its enhanced performance and features. Here are some ideas for leveraging the Raspberry Pi 3 in various domains:
- Home Automation:
- Smart Home Hub: Use the Raspberry Pi 3 as a central hub to control smart devices such as lights, thermostats, and security systems. Platforms like Home Assistant or OpenHAB can be installed to manage and automate your home environment.
- IoT Sensors: Connect various sensors (temperature, humidity, motion) to monitor and control home conditions. Data from these sensors can be processed and visualized in real-time.
- Media Center:
- Home Theater PC (HTPC): Transform the Raspberry Pi 3 into a media center using software like Kodi (formerly XBMC). It can stream and play HD videos, music, and handle media libraries, making it an affordable alternative to traditional media players.
- Retro Gaming Console: Install emulation software like RetroPie to create a retro gaming console. Play classic games from systems such as NES, SNES, and Sega Genesis using game ROMs.
- Educational Tool:
- Programming Education: Utilize the Raspberry Pi 3 to teach programming languages like Python, Scratch, and Java. Its affordability and versatility make it a great educational tool for students of all ages.
- STEM Projects: Create interactive projects for science, technology, engineering, and mathematics (STEM) education. Projects might include building simple robots, learning electronics through GPIO pins, or conducting experiments.
- Networking Projects:
- Personal Web Server: Set up a lightweight web server using software like Apache or Nginx. Host your own website, blog, or content management system (CMS) on the Raspberry Pi 3.
- Network-Attached Storage (NAS): Create a simple NAS device to store and share files over your home network. Software like OpenMediaVault can turn your Raspberry Pi 3 into a functional file server.
- DIY Projects:
- Weather Station: Build a weather station using sensors to collect data on temperature, humidity, and atmospheric pressure. Display the collected data on a web interface or use it for analysis.
- Security Camera System: Set up a network of cameras using the Raspberry Pi 3 and software like MotionEyeOS. Monitor and record video feeds for security purposes.
- Smart Displays:
- Digital Photo Frame: Convert the Raspberry Pi 3 into a digital photo frame that displays a slideshow of images from a local directory or an online photo service.
- Information Dashboard: Create a dashboard to display useful information such as news, weather, and calendar events. Use a touchscreen display for an interactive experience.
In essence, the Raspberry Pi 3’s combination of processing power, wireless connectivity, and GPIO capabilities make it a versatile tool for a wide range of projects. Whether you’re interested in home automation, multimedia, education, networking, or DIY creations, the Raspberry Pi 3 offers a cost-effective and flexible platform to bring your ideas to life.
Getting Started with the Raspberry Pi 3
Setting up the Raspberry Pi 3 is easy and opens up many project possibilities. Here’s how to get started:
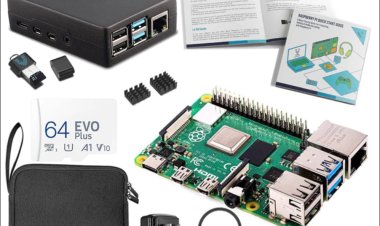
- Gather Your Materials: You'll need a Raspberry Pi 3, a microSD card (8GB or more), a microSD card reader, a USB keyboard and mouse, an HDMI cable, a monitor or TV, and a 5V micro USB power supply. A case is optional but recommended.
- Prepare the MicroSD Card: Download the latest Raspberry Pi OS from the official website. Use Balena Etcher to flash the OS image onto the microSD card. Insert the card into the reader, open Balena Etcher, select the OS image, choose the microSD card, and click “Flash.”
- Connect the Hardware: Insert the microSD card into the Raspberry Pi. Connect the HDMI cable to the Pi and your monitor. Plug in the keyboard and mouse. Finally, connect the power supply.
- Boot Up: When powered, the Raspberry Pi will boot up and guide you through an initial setup. Follow the prompts to configure your language, keyboard, and Wi-Fi.
- Update the System: Open a terminal and run:
sudo apt-get update
sudo apt-get upgrade
- Explore: Check out pre-installed software like Python and the Chromium browser. You’re now ready to start your projects!
With these steps, you’ll have your Raspberry Pi 3 ready for a variety of exciting applications.