Unleash the Magic of Raspberry Pi 3 Connectivity: Supercharge Your Projects
Discover how to unleash the magic of Raspberry Pi 3 connectivity and supercharge your projects with advanced techniques and tips
Introduction to Raspberry Pi 3 Connectivity
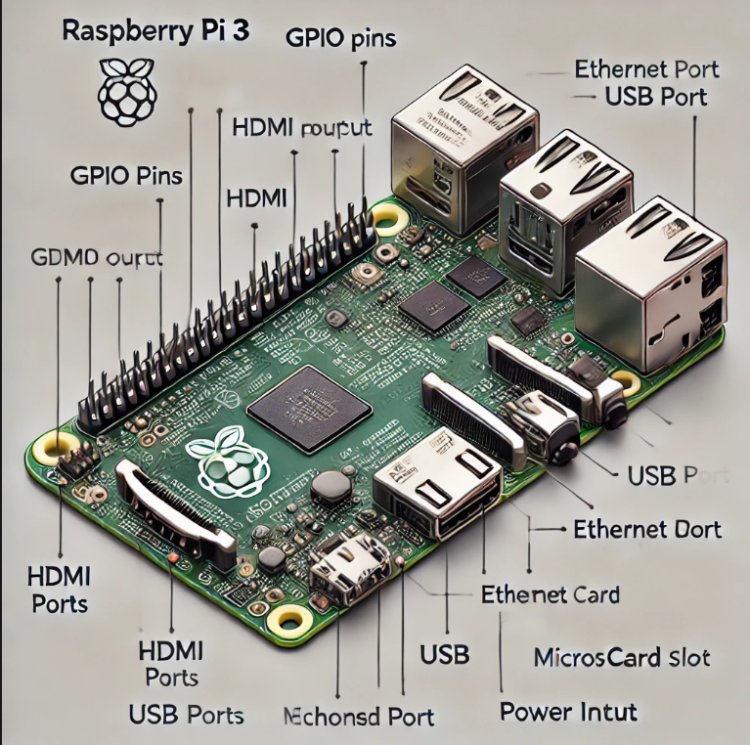
The Raspberry Pi 3, released in February 2016, introduced several connectivity enhancements that broaden its utility for various projects. Building on the foundation of its predecessors, the Raspberry Pi 3 includes a suite of networking and peripheral options that make it a robust platform for both hobbyists and professionals.
Connectivity Features
- Bluetooth: The Raspberry Pi 3 includes Bluetooth 4.2, enabling wireless connections with peripherals like keyboards, mice, and speakers. This adds versatility and convenience for various projects.
- USB Ports: It features four USB 2.0 ports for connecting a range of peripherals, including external storage, keyboards, and mice, expanding its functionality for different applications.
- HDMI Output: The HDMI port supports high-definition video and audio, allowing users to connect the Raspberry Pi 3 to monitors, TVs, or projectors for multimedia applications.
- Ethernet Port: A 10/100 Mbps Ethernet port provides reliable wired network connectivity, essential for applications requiring stable and fast internet connections.
- GPIO Pins: The 40-pin GPIO header remains a critical feature, enabling users to connect and control a variety of electronic components and build custom hardware projects.
These connectivity options make the Raspberry Pi 3 a versatile and powerful tool for a wide range of applications, from home automation and media centers to educational projects and IoT solutions.
Built-in Network Interfaces (Wi-Fi and Ethernet) on Raspberry Pi 3
The Raspberry Pi 3 significantly enhances connectivity with its integrated network interfaces, making it a versatile tool for various applications.
Wi-Fi
- Feature: The Raspberry Pi 3 comes with built-in 802.11n Wi-Fi.
- Functionality: This integration simplifies wireless networking, eliminating the need for external adapters. It supports reliable and fast wireless connections, ideal for internet access, streaming, and networking projects.
- Setup: Connecting to Wi-Fi is straightforward. The Raspberry Pi OS provides an easy-to-use network manager where you can select your Wi-Fi network and enter the password. The connection is typically established within seconds.
Ethernet
- Feature: The Raspberry Pi 3 includes a 10/100 Mbps Ethernet port.
- Functionality: This port offers a stable, wired network connection, which is crucial for applications requiring reliable and consistent network performance, such as servers or networked media centers.
- Setup: Simply plug an Ethernet cable into the port, connect the other end to a router or switch, and the Raspberry Pi 3 will automatically configure the network settings via DHCP.
Together, the built-in Wi-Fi and Ethernet interfaces provide flexible networking options, allowing the Raspberry Pi 3 to handle a variety of tasks and projects with ease, whether through a wireless or wired connection.
USB Ports and Peripheral Integration on Raspberry Pi 3
The Raspberry Pi 3 offers a range of USB connectivity options that enhance its functionality and versatility for various projects.
USB Ports
- Configuration: The Raspberry Pi 3 is equipped with four USB 2.0 ports.
- Functionality: These ports support a wide array of peripherals, including keyboards, mice, external hard drives, and USB hubs. This flexibility allows users to expand the capabilities of their Raspberry Pi 3, whether for basic computing tasks or more complex setups.
Peripheral Integration
- Keyboards and Mice: Easily connect a USB keyboard and mouse to interact with the Raspberry Pi 3. This is essential for direct user input and control, especially during initial setup or for regular use.
- External Storage: Use the USB ports to connect external storage devices such as USB flash drives or hard drives. This provides additional storage capacity for files, media, and software, making the Raspberry Pi 3 a practical choice for data-intensive projects.
- USB Hubs: If additional USB ports are needed, a USB hub can be connected to one of the available ports. This allows you to expand the number of connected devices, accommodating a variety of peripherals and accessories.
- Other Devices: The USB ports are also compatible with various other devices, including printers, cameras, and more, depending on your project’s requirements.
The USB ports and peripheral integration capabilities of the Raspberry Pi 3 make it a powerful and adaptable platform, suitable for a wide range of applications from everyday computing to specialized projects.
GPIO Pins and Expansion HATs on Raspberry Pi 3
The Raspberry Pi 3 offers extensive GPIO (General Purpose Input/Output) capabilities and supports various expansion options through HATs (Hardware Attached on Top), enhancing its versatility for electronics projects.
GPIO Pins
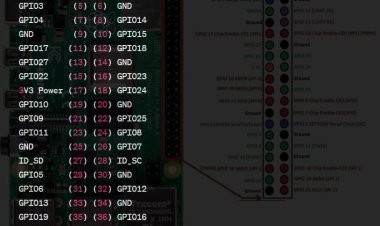
- Configuration: The Raspberry Pi 3 features a 40-pin GPIO header.
- Functionality: These pins provide a range of digital I/O options, allowing you to interface with sensors, motors, LEDs, and other electronic components. The GPIO pins are divided into power, ground, and functional pins, including options for serial communication (UART), pulse-width modulation (PWM), and I²C communication.
- Usage: GPIO pins can be used for custom hardware projects, enabling control and interaction with various devices. They are essential for prototyping and experimentation, making the Raspberry Pi 3 suitable for tasks ranging from simple automation to complex robotics.
Expansion HATs
- Definition: HATs are add-on boards designed to plug directly into the GPIO header.
- Functionality: These expansion boards include an EEPROM that provides configuration information and ensures compatibility. They offer additional functionality such as enhanced I/O options, sensors, or connectivity features.
- Examples: HATs can include a variety of features, such as temperature and humidity sensors, motor controllers, or display modules. By using HATs, users can easily expand the Raspberry Pi 3’s capabilities without needing to design custom hardware.
The GPIO pins and HATs make the Raspberry Pi 3 a powerful tool for building and expanding electronic projects, providing flexibility and ease of use for both hobbyists and professionals.
Troubleshooting Connectivity Issues on Raspberry Pi 3
Connectivity issues with the Raspberry Pi 3 can disrupt projects, but most problems have simple solutions. Here’s a guide to troubleshooting common connectivity problems:
- Wi-Fi Issues:
- Check Network Credentials: Ensure that the Wi-Fi network name (SSID) and password are correctly entered. Mismatched credentials can prevent connection.
- Signal Strength: Verify that the Raspberry Pi 3 is within range of the Wi-Fi router. Move closer if necessary or check for physical obstructions.
- Restart: Reboot both the Raspberry Pi and your Wi-Fi router. This can resolve temporary network issues.
- Interface Recognition: Confirm that the Wi-Fi adapter is recognized by running `ifconfig` or `iwconfig` in the terminal. If not, ensure it’s properly connected and that the correct drivers are installed.
- Ethernet Issues:
- Cable and Connection: Ensure that the Ethernet cable is securely plugged into both the Raspberry Pi 3 and the router or switch. Test with a different cable if needed.
- Network Configuration: Run `ifconfig` to check if the Ethernet interface has an IP address. If not, verify that the router is providing DHCP services or set a static IP address manually.
- Network Status: Check the network status lights on the Raspberry Pi’s Ethernet port and the router to confirm active connections.
- USB and Peripherals:
- Power Supply: Ensure that the Raspberry Pi 3 is receiving adequate power, as insufficient power can cause peripheral devices to malfunction.
- Device Recognition: Use `lsusb` to list connected USB devices and verify that peripherals are recognized. Try different USB ports or devices if issues persist.
By following these troubleshooting steps, you can address common connectivity issues on the Raspberry Pi 3, ensuring a smoother and more reliable experience for your projects.