Step-by-Step Guide: Raspberry Pi LED Blink Tutorial
Get started with LED blinking on Raspberry Pi with this comprehensive tutorial for beginners!

Raspberry Pi LED Blink Tutorial
The Raspberry Pi is an incredibly powerful and versatile device. One of the fun things you can do with a Raspberry Pi is to make an LED blink on and off. This is a great project for anyone who's new to the Raspberry Pi, as you'll learn not only about controlling the GPIO pins but also about electronics and circuit building.
This tutorial will explain the basics of hooking up an LED to the Raspberry Pi and getting it to blink on and off. We'll be using a breadboard and a few electronics basics to make it happen. Before starting this project, make sure you have the following materials:
Components Required:
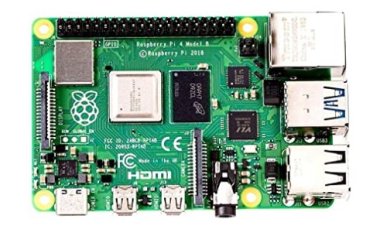
- Raspberry Pi 4
- Breadboard
- LED (Light Emitting Diode)
- Resistor (220 ohms)
- Jumper wires
Step 1: Set up the Hardware
- Connect the longer leg (anode) of the LED to a GPIO pin on the Raspberry Pi.
- Connect the shorter leg (cathode) of the LED to a resistor (220 ohms).
- Connect the other end of the resistor to any of the Ground (GND) pins on the Raspberry Pi.
- Use jumper wires to make the necessary connections between the Raspberry Pi and the breadboard.
Step 2: Write the Program
import RPi.GPIO as GPIO
import time
#GPIO mode
GPIO.setmode(GPIO.BCM)
#GPIO pin
led_pin = 17
GPIO.setup(led_pin, GPIO.OUT)
#Blink the LED
try:
while True:
GPIO.output(led_pin, GPIO.HIGH) # Turn on the LED
time.sleep(1) # Wait for one second
GPIO.output(led_pin, GPIO.LOW) # Turn off the LED
time.sleep(1) # Wait for one second
except KeyboardInterrupt:
# Clean up GPIO settings on keyboard interrupt
GPIO.cleanup()
Step 3: Save the Program
- Save the code in a Python file, for example,
led_blink.py, on your Raspberry Pi.
Step 4: Run the Program
- Open a terminal on the Raspberry Pi.
- Navigate to the directory where the Python file is saved.
- Execute the program by running the following command:
python led_blink.py
Step 5: Observe the LED
- You should see the LED connected to the GPIO pin blinking at a regular interval of one second.
OverView
The principal thing to do is to wire up the breadboard. Interface the short leg of the Prompted the ground pin of the Raspberry Pi, and associate the long leg of the Prompted a 330 ohm resistor. Then, at that point, associate the opposite finish of the resistor to one of the GPIO pins on the Raspberry Pi.
When your circuit is finished, download and introduce the GPIO library. Then, at that point, utilizing the library, make a content to turn a GPIO nail to and off. When you have your content, turn on the Raspberry Pi, and it ought to begin squinting the Drove!
As may be obvious, it's not exceptionally challenging to get a Prompted squint on and off with the Raspberry Pi. With only a couple of basic advances, you can have your own Raspberry Pi Drove squint undertaking ready. Have a good time!
- The program utilizes the RPi.GPIO library to control the GPIO pins on the Raspberry Pi.
- It sets up the GPIO mode and characterizes the Drove pin as a result pin.
- Inside the attempt aside from block, the program enters a limitless circle.
- In every emphasis of the circle, the Drove is turned on briefly by setting the GPIO pin to a high state utilizing GPIO.output(led_pin, GPIO.HIGH).
- Then, the Drove is switched off briefly by setting the GPIO pin to a low state utilizing GPIO.output(led_pin, GPIO.LOW).
- The circle go on until a console hinder happens (Ctrl+C), so, all in all the GPIO settings are tidied up utilizing GPIO.cleanup().