Raspberry Pi 5MP Camera
Explore the world of photography with the versatile Raspberry Pi 5MP Camera. High-quality images await!

Introduction
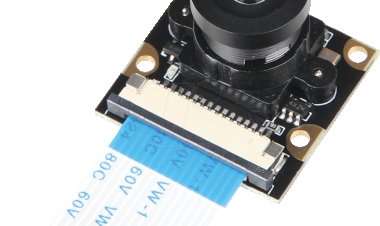
The Raspberry Pi 5MP Camera Board
Module is an adornment intended for Raspberry Pi single-board PCs. It includes a 5-megapixel fixed-center camera sensor and is fit for catching both still pictures and video film. The module associates straightforwardly to the Raspberry Pi's Camera Sequential Connection point (CSI) port, making it simple to coordinate into different tasks, including photography, video recording, reconnaissance, and PC vision applications.
Key highlights of the Raspberry Pi 5MP Camera Board Module include:
- 5MP goal
- Fixed center
- 1080p video recording at 30fps
- Minimized size
- CSI interface
- Programming similarity
Raspberry Pi 5MP Camera Board Module is a flexible and reasonable camera answer for Raspberry Pi lovers and creators, empowering them to add imaging and video capacities to their undertakings easily.

Features and Specifications
The Raspberry Pi 5MP Camera Module is a popular accessory for Raspberry Pi single-board computers, known for its compact design and versatility in various applications. Here are the key features and specifications of the Raspberry Pi 5MP Camera Module:
Features:
- 5-Megapixel Camera: The module features a 5-megapixel fixed-focus camera sensor, allowing you to capture high-resolution images and video.
- Fixed Focus: The camera module has a fixed-focus lens, so it doesn't require manual focusing adjustments. It's optimized for general-purpose photography and video recording.
- Video Recording: It can record video at up to 1080p (Full HD) resolution at 30 frames per second (fps), making it suitable for high-definition video projects.
- Still Image Capture: In addition to video, the camera module can capture still images at a maximum resolution of 2592 x 1944 pixels.
- CSI Interface: The module connects directly to the Raspberry Pi's Camera Serial Interface (CSI) port, providing a fast and reliable data connection. This allows for real-time streaming and efficient data transfer between the camera and the Raspberry Pi.
- Compact Size: The camera module is small and lightweight, making it easy to integrate into various projects, including robotics, surveillance, computer vision, and more.
- Software Support: The module is supported by the official Raspberry Pi operating systems, including Raspbian and Raspberry Pi OS. It also works with a wide range of third-party software libraries and applications for image and video processing.
Specifications:
- Image Sensor: OmniVision OV5647 5-megapixel CMOS sensor.
- Lens: Fixed-focus lens with an aperture of f/2.9.
- Field of View: Approximately 54 degrees horizontal.
- Frame Rate: Up to 30 frames per second for 1080p video.
- Dimensions: Approximately 25mm x 20mm x 9mm (L x W x H).
- Weight: Approximately 3 grams.
The Raspberry Pi 5MP Camera Module is a versatile and affordable camera solution that empowers Raspberry Pi enthusiasts, makers, and developers to add imaging and video capabilities to their projects. Its ease of use, compatibility with Raspberry Pi models, and wide range of applications make it a popular choice for various DIY and prototyping endeavors.

Compatibility
The Raspberry Pi 5MP Camera Module is compatible with several Raspberry Pi models featuring a Camera Serial Interface (CSI) connector, including:
- Raspberry Pi 1 Model A+ and B+: Compatible with these early models (excluding the very first Raspberry Pi Model A and Model B).
- Raspberry Pi 2 Model B: Compatible, offering improved performance.
- Raspberry Pi 3 Model A+, B+, and B: Compatible with all these models.
- Raspberry Pi 4 Model B: Fully compatible with the latest Raspberry Pi 4 model.
- Raspberry Pi Zero and Zero W: Compatible with the smaller Raspberry Pi Zero and Zero W models, but an adapter cable may be needed.
- Raspberry Pi Zero 2 W: Compatible with the Raspberry Pi Zero 2 W, with an adapter cable requirement.
Make sure to check for any necessary cable connectors or adapters for your specific Raspberry Pi model, as they may vary. Additionally, ensure that the relevant software drivers and settings are configured based on your Raspberry Pi model.
Installation and Setup
Connecting the Raspberry Pi Camera Module to a Raspberry Pi board is a straightforward process. Here's a step-by-step guide on how to physically connect the camera module to the Raspberry Pi:
Note: Ensure that you have powered off your Raspberry Pi and disconnected it from the power source before proceeding.
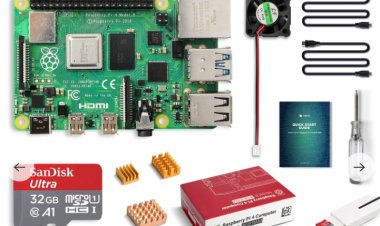
Required Components:
- Raspberry Pi board (compatible with the Camera Module).
- Raspberry Pi Camera Module (5MP or compatible version).
- Appropriate adapter cable (if needed, depending on the Raspberry Pi model).
Step 1: Identify the Camera Module Connector
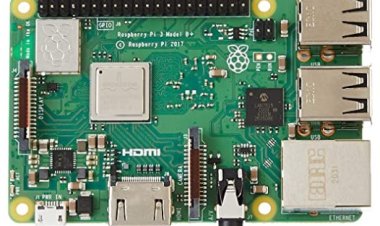
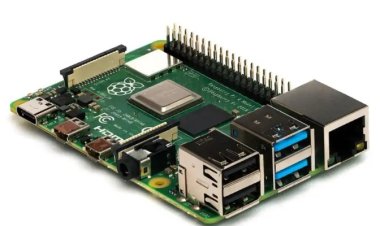
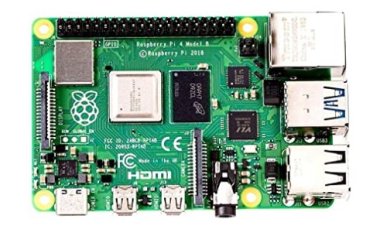
Look at the Raspberry Pi board and locate the Camera Serial Interface (CSI) connector. This is typically a small, rectangular connector located near the HDMI port. It's labeled "CSI" and may have a flap or latch to secure the cable.
Step 2: Unlock the CSI Connector (if applicable)
If your Raspberry Pi board has a flap or latch over the CSI connector, gently lift it to unlock the connector. Some models, like the Raspberry Pi Zero, may not have a flap.
Step 3: Connect the Camera Module Cable
Take the ribbon cable attached to the camera module and insert it into the CSI connector on the Raspberry Pi. Make sure the metal contacts on the cable are facing the HDMI port or in the direction specified by the Raspberry Pi board.
Step 4: Secure the Cable (if applicable)
If your Raspberry Pi has a flap or latch over the CSI connector, press it down gently to secure the ribbon cable in place. This helps ensure a stable connection.
Step 5: Adjust the Camera Module Orientation (if needed)
Depending on your project and how you intend to use the camera module, you may need to adjust its orientation. The camera module itself can be rotated or angled. Carefully adjust it to capture images or video as desired.
Step 6: Power On the Raspberry Pi
Now that the camera module is connected, you can power on your Raspberry Pi. If you have not configured the camera module in software yet, follow the official Raspberry Pi documentation to enable and configure the camera interface.
Step 7: Test the Camera Module
After setting up the software and configuring the camera, you can test it by taking pictures or recording video using commands like `raspistill` or `raspivid` in the terminal.
Here are some example commands to test the camera:
To take a picture and save it as `image.jpg`:
raspistill -o image.jpg
To record video for 10 seconds and save it as `video.h264`:
raspivid -o video.h264 -t 10000
This completes the physical connection of the Raspberry Pi Camera Module to your Raspberry Pi board. Once you've successfully connected and configured the camera, you can use it for various applications, such as photography, video recording, or computer vision projects.
Capturing Images
Capturing still images using Python and the Raspberry Pi Camera Module is a common and straightforward task. You can use the `picamera` Python library to interact with the camera module. Here's a step-by-step guide on how to capture still images using Python:
Step 1: Set up your Raspberry Pi and Camera Module
Make sure you have a Raspberry Pi board with a compatible Camera Module connected as described in the previous response.
Step 2: Install the `picamera` Library (if not already installed)
The `picamera` library is pre-installed on most Raspberry Pi operating systems. However, if it's not installed, you can do so using the following command:
sudo apt-get update
sudo apt-get install python3-picamera
Step 3: Write a Python Script
Create a Python script to capture still images. You can use a text editor or an integrated development environment (IDE) like Thonny or VSCode. Here's a basic example script:
import picamera
from time import sleep
# Create a PiCamera object
camera = picamera.PiCamera()
try:
# Set camera resolution (optional)
camera.resolution = (1920, 1080) # Adjust to your desired resolution
# Wait for the camera to warm up (optional)
sleep(2)
# Capture a still image and save it to a file
camera.capture('/home/pi/image.jpg') # Specify the file path and name
print("Image captured successfully!")
finally:
# Close the camera when done
camera.close()
In this script:
- We import the `picamera` library and the `sleep` function.
- We create a `PiCamera` object.
- Optionally, we set the camera resolution. You can adjust this to your preferred resolution.
- We wait for the camera to warm up for a couple of seconds (optional but recommended).
- We capture a still image using the `capture()` method and specify the file path where the image will be saved.
Step 4: Run the Python Script
Save the Python script to a file (e.g., `capture_image.py`) on your Raspberry Pi. Then, open a terminal and execute the script using Python:
python3 capture_image.py
The script will run, capture an image, save it to the specified file path, and print "Image captured successfully!" to the terminal.
You can now find the captured image at the specified file path (in this example, `/home/pi/image.jpg`).
Customize the script as needed for your project, adjusting settings like resolution, file path, and capture triggers based on your requirements. This basic example should help you get started with capturing still images using Python and the Raspberry Pi Camera Module.
Advanced Features
The Raspberry Pi Camera Module, when used with the `picamera` library in Python, allows you to adjust focus, exposure, and white balance settings to capture high-quality images with precision. Here's an overview of how to adjust these settings:
- Adjusting Focus:
The Camera Module has a fixed-focus lens, but you can still achieve focus adjustments:
- Software Focus Stacking: Capture multiple images at varying focus distances and use software to stack them for enhanced depth of field.
- External Lenses: Attach external lenses or adapters to gain manual focus control.
- Adjusting Exposure:
Control how the camera sensor gathers light:
- Shutter Speed: Use `shutter_speed` to set exposure duration. Longer times capture more light but may introduce motion blur.
- ISO Sensitivity: Adjust sensitivity with the `iso` property. Lower values reduce noise but require more light.
- Adjusting White Balance:
Ensure accurate colors in different lighting:
- AWB (Automatic White Balance): The default option adjusts white balance automatically based on ambient light.
- Manual White Balance: Use the `awb_mode` property to set custom white balance, choosing modes like `'sunlight'`, `'cloudy'`, `'shade'`, etc.
Here's an example script for adjusting exposure and white balance settings using `picamera`:
import picamera
from time import sleep
camera = picamera.PiCamera()
try:
# Adjust exposure settings
camera.shutter_speed = 1000 # Set shutter speed to 1/1000 second
camera.iso = 200 # Set ISO sensitivity to 200
# Adjust white balance
camera.awb_mode = 'sunlight' # Set white balance to sunlight
# Capture an image
camera.capture('/home/pi/custom_image.jpg')
print("Image captured successfully!")
finally:
camera.close()
Experimenting with these settings will help you capture images tailored to your project's lighting conditions and quality requirements, enhancing the versatility of your Raspberry Pi Camera Module.
Conclusion
In conclusion, the Raspberry Pi 5MP Camera Module is a versatile and valuable accessory for Raspberry Pi enthusiasts and makers. Key benefits and features include:
- High Resolution: The 5-megapixel sensor captures high-quality images and 1080p video.
- Compact Size: Its small, lightweight design suits various projects, from robotics to surveillance.
- Ease of Use: The module connects directly to the Raspberry Pi's CSI port for a reliable and high-speed data connection.
- Software Support: It's compatible with official Raspberry Pi OS and third-party libraries for image and video processing.
- Customization: Advanced users can fine-tune focus, exposure, and white balance settings.
- Affordability: The camera module provides excellent value for DIY and prototyping projects.
Whether for photography, video, surveillance, or computer vision, this camera module offers flexibility and capability. Its compatibility with multiple Raspberry Pi models makes it a popular choice for diverse projects involving visual data capture and processing.