Raspberry Pi Arcade Cabinet
Discover the must-have components for your Raspberry Pi arcade cabinet project.
What is Raspberry Pi Arcade Cabinet
A Raspberry Pi Arcade Cabinet is a DIY gaming system using a Raspberry Pi computer integrated into a custom cabinet for emulating classic arcade games. Here's how it's done:
- Choose Hardware: Select a Raspberry Pi model, arcade controls, display screen, and components.
- Construct Cabinet: Build a cabinet using materials like wood, mimicking classic arcade cabinets.
- Install Emulation Software: Put RetroPie or Recalbox on the Raspberry Pi for game emulation.
- Add Game ROMs: Get legal game ROMs, store them on the Raspberry Pi.
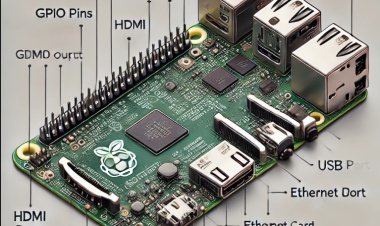
- Setup Controls: Wire arcade controls to Raspberry Pi's GPIO pins or USB ports.
- Configure Software: Set up emulation software to recognize controls, configure graphics, and sound.
- Design User Interface: Create menus, artwork, and themes for game selection.
- Assemble: Place Raspberry Pi, screen, and controls inside the cabinet.
- Test and Refine: Thoroughly test gameplay, controls, and make needed adjustments.
- Finalize Appearance: Add finishing touches like artwork, decals, and lighting.
Result: Functional arcade cabinet offering nostalgic gaming via Raspberry Pi. Loved by retro gaming fans and DIY enthusiasts.
Gathering Your Materials
step-by-step guide to gathering materials for your Raspberry Pi arcade cabinet:
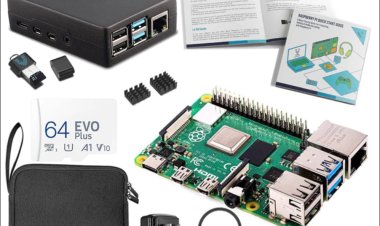
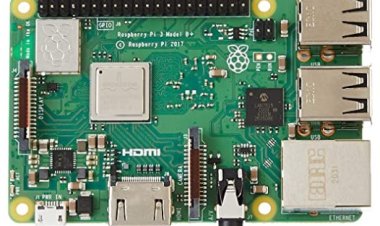
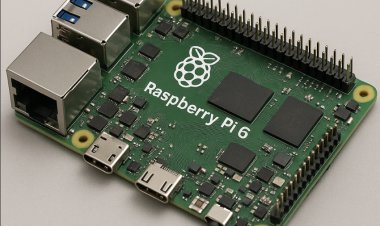
- Choose Raspberry Pi Model:
Select a suitable Raspberry Pi model. Raspberry Pi 4 is popular for its performance.
- Choose Cabinet Option:
Decide between a pre-made kit or building from scratch.
- Get Monitor:
Pick a screen that fits your cabinet, either HDMI or compatible.
- Buttons and Joystick:
Buy arcade-style buttons and joystick; consider the number needed.
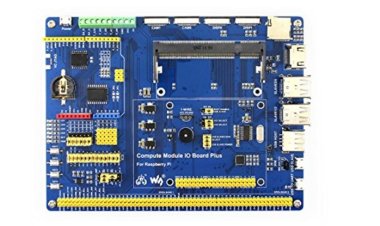
- USB Encoder:
Get a USB encoder to connect buttons and joystick to Raspberry Pi.
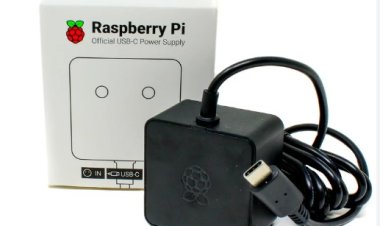
- Power Supply:
Ensure proper power supplies for Pi and monitor.
- MicroSD Card:
Acquire a MicroSD card for OS and game emulation software.
- Audio Components:
Get speakers; consider adding an amplifier.
- Wiring and Connectors:
Gather required wiring, connectors, and tools for assembly.
- Basic Tools:
Collect screwdrivers, pliers, wire cutters, and soldering iron.
- Design and Artwork:
Plan cabinet materials and exterior artwork if custom building.
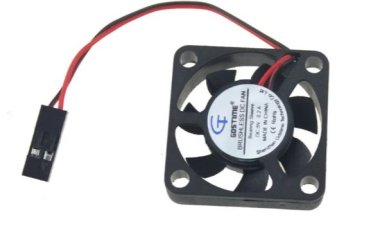
- Cooling Solution (optional):
Consider heat sinks or fans for cooling, depending on usage.
- External Controllers (optional):
Add support for external controllers if desired.
- Ethernet/Wi-Fi Adapter:
For online features, grab an Ethernet or Wi-Fi adapter.
Remember to ensure compatibility between components and Raspberry Pi. Plan your cabinet's layout and design before assembly.
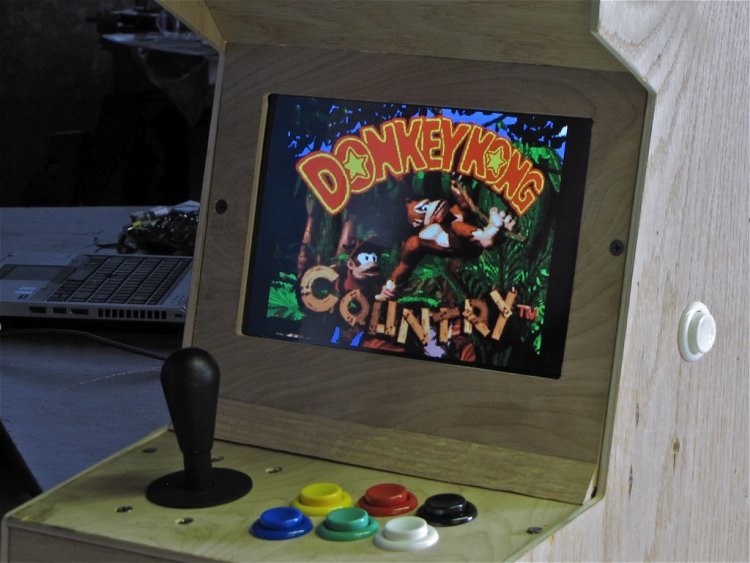
Designing and Constructing the Cabinet
designing and constructing your Raspberry Pi arcade cabinet:
- Plan Design: Decide on size, style, and control layout. Sketch design ideas.
- Choose Materials: Select sturdy materials like MDF or plywood for the cabinet.
- Cut and Assemble Panels: Cut and assemble panels based on your design plans.
- Create Display Opening: Cut an opening for your monitor in the front panel.
- Design Control Layout: Plan button and joystick layout for the control panel.
- Cut Control Holes: Carefully cut holes for buttons and joystick.
- Install Controls: Mount buttons and joystick securely in the holes.
- Wire Controls: Connect buttons and joystick to the USB encoder.
- Attach Monitor: Fix the monitor inside the opening.
- Install Raspberry Pi: Place the Raspberry Pi inside the cabinet.
- Add Speakers: Strategically position speakers or an amplifier.
- Consider Cooling: If needed, add cooling solutions like fans.
- Apply Artwork: Decorate the cabinet with decals or graphics.
- Manage Wiring: Organize wiring for a clean look.
- Test Components: Ensure all components work properly.
- Final Assembly: Secure all parts and panels in place.
- Power Up: Turn on your cabinet and enjoy your games!
Remember, adapt these steps to your chosen design and components for the best results.
Setting Up Emulation Software
Setting up emulation software on your Raspberry Pi arcade cabinet is the next step after designing and constructing the physical cabinet. Follow these steps to install and configure the emulation software, such as RetroPie, to play your favorite classic games:
- Prepare MicroSD Card:
Insert the MicroSD card into your computer and format it if needed. Make sure it's empty and ready for the software installation.
- Download RetroPie:
Visit the RetroPie website (https://retropie.org.uk/) and download the latest version of the RetroPie image for your Raspberry Pi model.
- Flash RetroPie Image:
Use a tool like Etcher (https://www.balena.io/etcher/) to flash the RetroPie image onto the MicroSD card. This will create a bootable RetroPie system.
- Configure Wi-Fi (optional):
If you want to use Wi-Fi, create a file named "wpa_supplicant.conf" in the boot partition of the MicroSD card. Add your Wi-Fi network details to this file.
```
country=YOUR_COUNTRY_CODE
ctrl_interface=DIR=/var/run/wpa_supplicant GROUP=netdev
update_config=1
network={
ssid="YOUR_SSID"
psk="YOUR_WIFI_PASSWORD"
}
```
- Configure Controllers:
Create a file named "retroarch.cfg" in the "/opt/retropie/configs/all/" directory on the MicroSD card. Add your controller configuration settings to this file.
- Insert MicroSD Card:
Insert the MicroSD card into the Raspberry Pi inside the arcade cabinet.
- Power On:
Power on your arcade cabinet. RetroPie should boot up.
- Initial Configuration:
Follow the on-screen instructions to configure your controls, language, and other settings.
- Transfer ROMs:
Connect to your Raspberry Pi via network (SFTP or SSH) or by directly inserting a USB drive with ROMs. Transfer your legally owned game ROMs into the appropriate system folders under "/home/pi/RetroPie/roms/".
- Scraper (optional):
You can use the built-in scraper to download game artwork and metadata for a more polished look in the interface.
- Test Games:
Navigate to the game system and select a game to play. Use your arcade controls to enjoy classic gaming.
- Additional Settings:
Explore RetroPie's settings to customize the interface, shaders, and other aspects of the emulation experience.
- Explore EmulationStation:
EmulationStation is the frontend used by RetroPie. Spend time customizing its appearance, themes, and other options.
- Regular Maintenance:
Update RetroPie and manage your ROM collection periodically to ensure optimal performance.
Remember that game ROMs are subject to copyright laws. Only use ROMs for games that you legally own the original copies of. With proper setup and configuration, your Raspberry Pi arcade cabinet can provide hours of nostalgic gaming fun!
Configuring Controls and Software
Configuring controls and software for your Raspberry Pi arcade cabinet is crucial to ensure that your games are playable and enjoyable. Here's a compressed step-by-step guide to help you through this process:
- Configure Controls:
Access the RetroPie main menu using a keyboard or controller. Navigate to "Configure Input" and follow the prompts to map buttons and controls for each player.
- Test Controls:
Launch a game to test if controls are responsive and properly configured. Adjust settings if needed.
- Configure RetroArch:
RetroArch is the backend that RetroPie uses for emulation. Access the RetroArch menu by pressing "Hotkey + B" during gameplay. Configure graphics, audio, and input settings to your preference.
- Save Configuration:
In RetroArch, save your configuration settings to make them consistent across games.
- Configure Overlays (optional):
Overlays can mimic the look of original arcade cabinets. Load overlays in RetroArch for an authentic experience.
- Configure EmulationStation:
Access the EmulationStation menu using "Start" or your configured hotkey. Customize themes, appearance, and other settings.
- Organize ROMs:
Arrange your game ROMs in appropriate folders to keep your collection organized.
- Add Emulators (optional):
RetroPie supports multiple emulators for different systems. If needed, configure and add emulators for specific consoles.
- Enable Cheats (optional):
RetroArch allows cheat codes. Enable and configure cheats if desired.
- Configure Savestates (optional):
Set up savestates to pause and resume games at any point.
- Configure Video Output:
Adjust video settings in RetroPie to match your monitor's resolution and refresh rate.
- Configure Audio Output:
Check audio settings and ensure your preferred audio output source is selected.
- Backup Configuration:
Regularly back up your RetroPie configuration and game saves.
- Add Metadata and Artwork (optional):
Enhance your gaming experience by adding box art, descriptions, and other metadata for your games.
- Performance Optimization (optional):
If experiencing performance issues, adjust emulator settings or consider overclocking your Raspberry Pi (if supported).
- Regular Updates:
Keep RetroPie, emulators, and your Raspberry Pi's operating system up to date for optimal performance.
- Test and Fine-Tune:
Play various games to ensure controls, audio, and visuals are satisfying. Make adjustments as needed.
- Enjoy Your Cabinet:
Once you're satisfied with the configuration, enjoy your fully functional Raspberry Pi arcade cabinet and relive classic gaming moments!